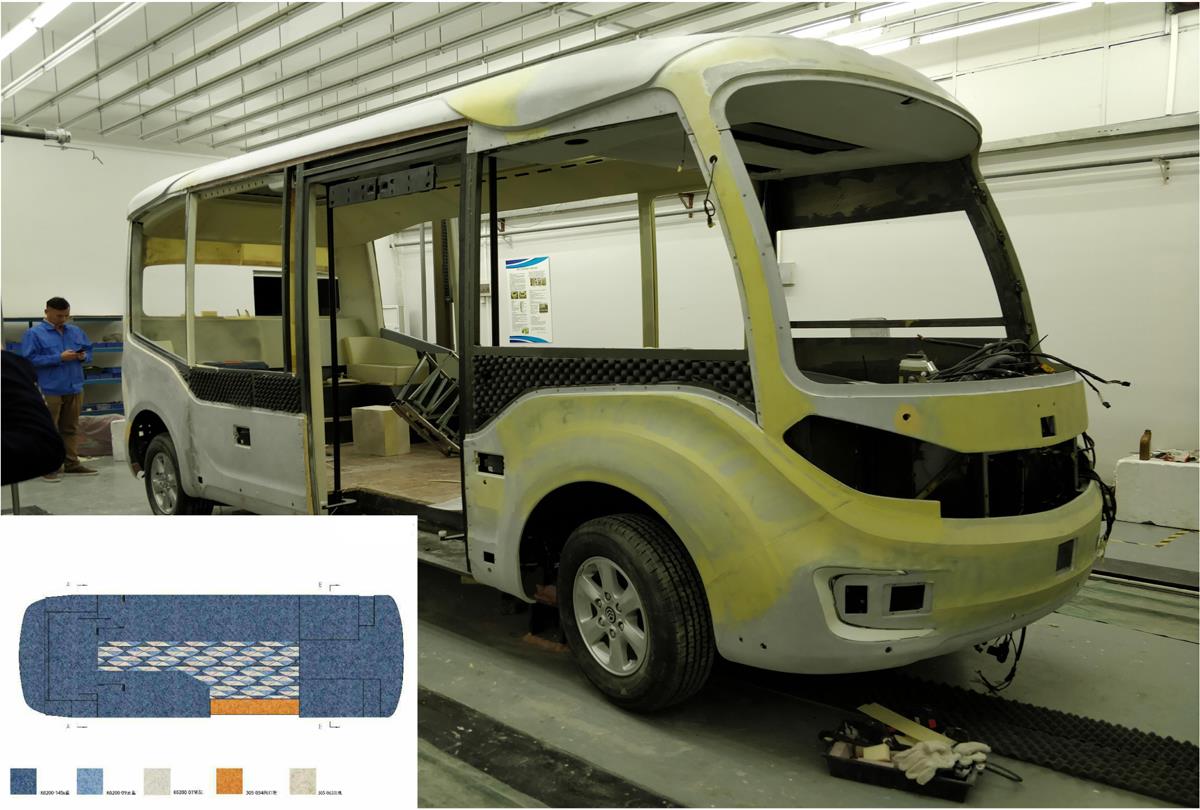
1. Bus Installation and Flooring Design

2. Tools required for installation
| Product Name | Specifications | Unit | Quantity |
| adhesive | 6KG | set | 3 |
| Adhesive scraper |
|
piece | 2 |
| mixer |
|
set | 1 |
| Dolphin Knife |
|
piece | 1 |
| Flying edge knife |
|
piece | 1 |
| Double ended pressure roller |
|
set | 1 |
| 50KG Large pressure roller |
|
set | 1 |
| 2M steel ruler |
|
piece | 1 |
| cleaning box |
|
barrel | 1 |
| Masking tape |
|
roll | 2 |
| all-purpose adhesives | 2.5L | barrel | 1 |
3. Installation process
(1) Seamless Tiling
Close Seaming: When laying elastic flooring, the edges of the two floors are overlapped by about 20mm, and then cut neatly with a knife to form a dense seam.
——The two sides of the sealed joint are not connected together.
——The seams are less than 1mm and not easily noticeable.
(2) Hot welding
Hot welding: After the installation completed, use specialized welding rods corresponding to the material of the elastic flooring,adjust the temperature of the hot welding according to the type of flooring.
——Use hot welding to evenly fuse both sides of the floor joint.
——The hot welding seams width between 3-4mm, use different colored welding rods to highlight the seam effect. The disadvantage is that the welding lines are prone to cracking and falling off over time.
4. Specific installation process of vinyl flooring and mosaic
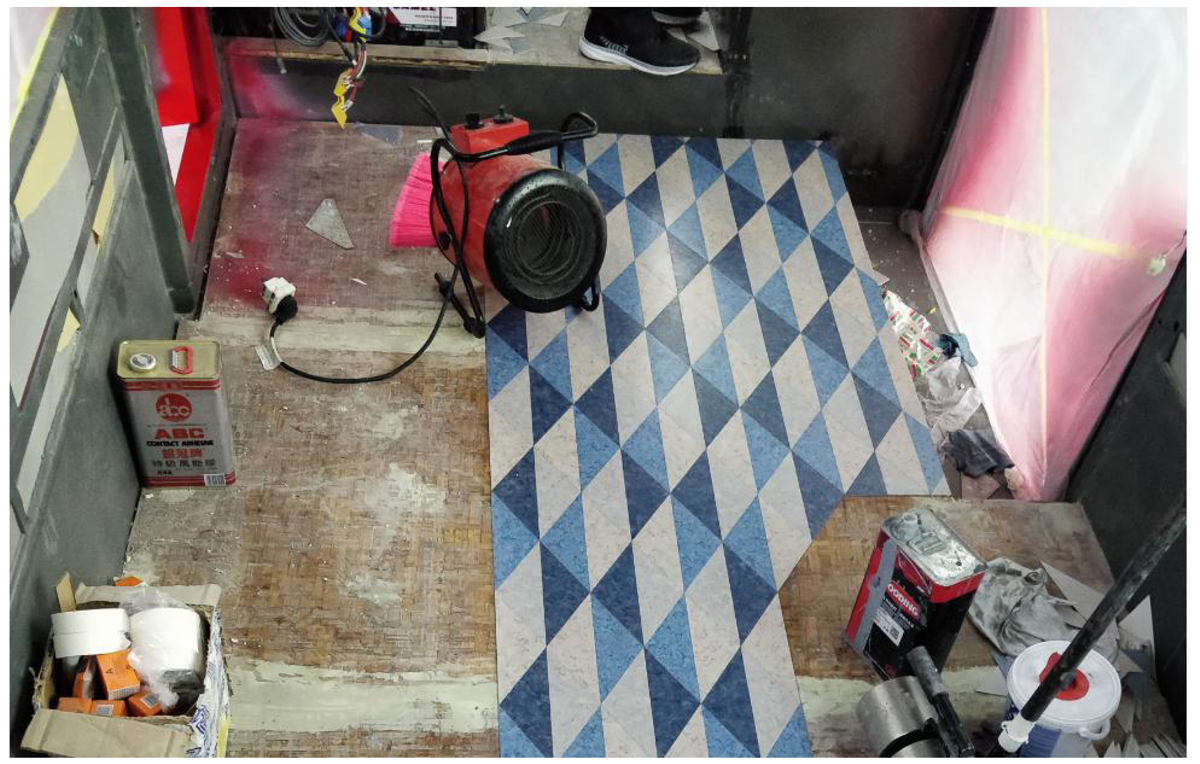
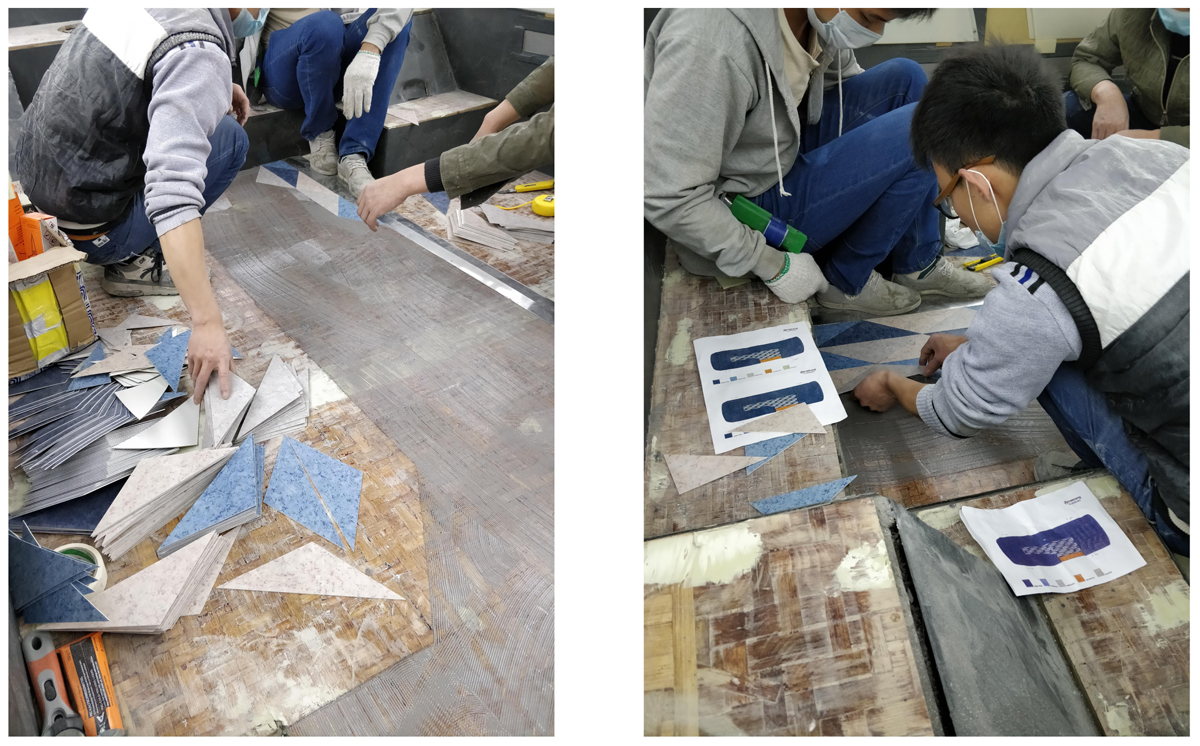
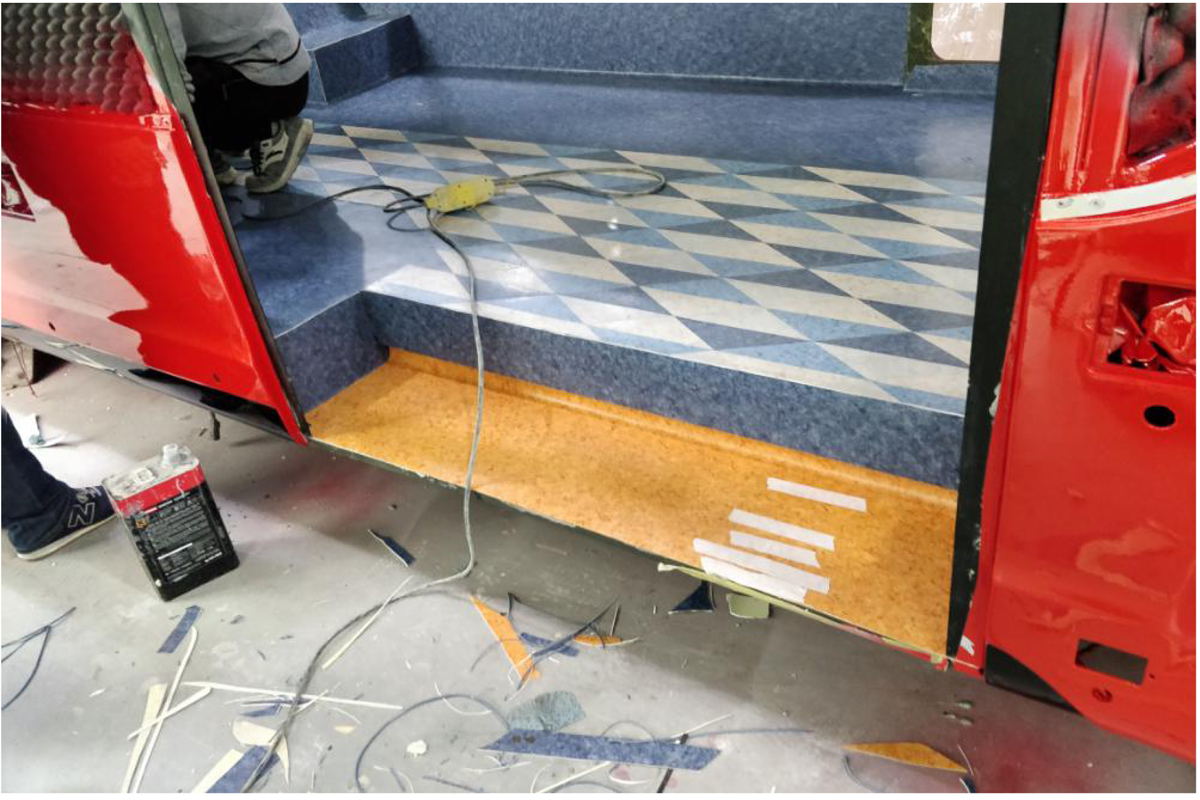
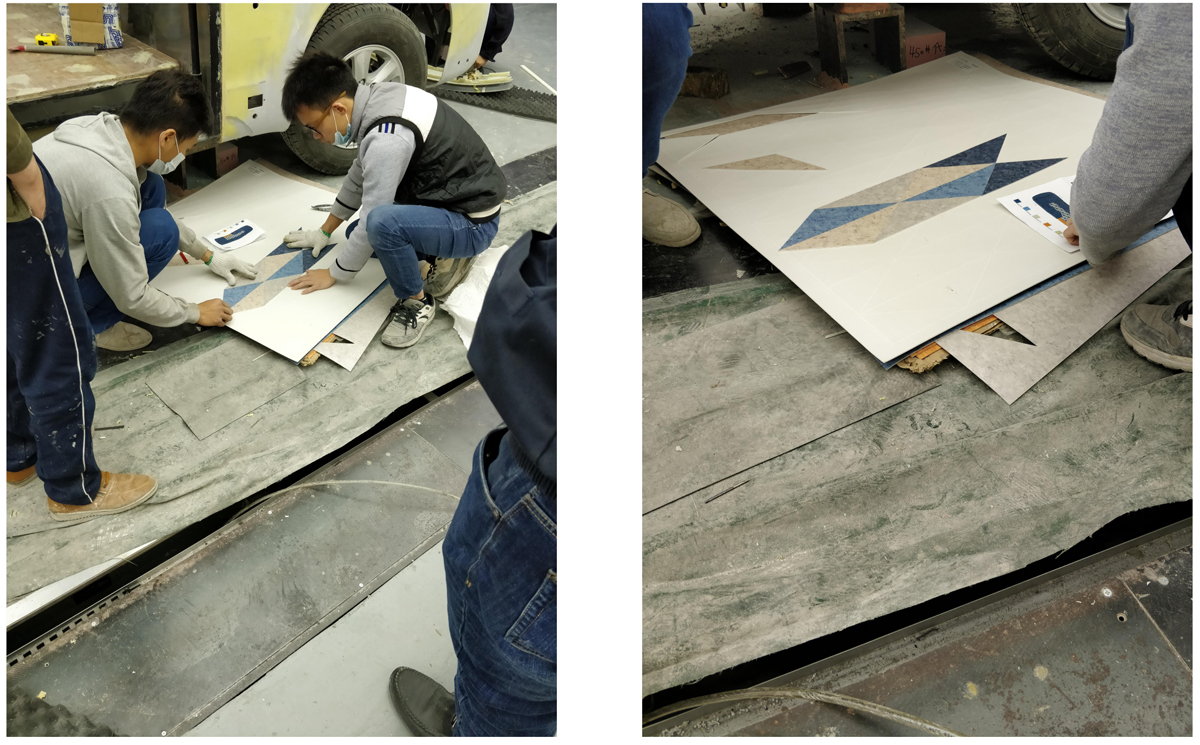
(1) Determine the order of installation, whether it is full-color vinyl flooring or mosaic tiles according the drawings. The mosaic tile floorings are all organically patterned, it is necessary to cut and try to splice the sample in advance.
(The mosaic part is the area surrounded in the middle, while other areas are easier to be laid, so the mosaic laying should be carried out first.)
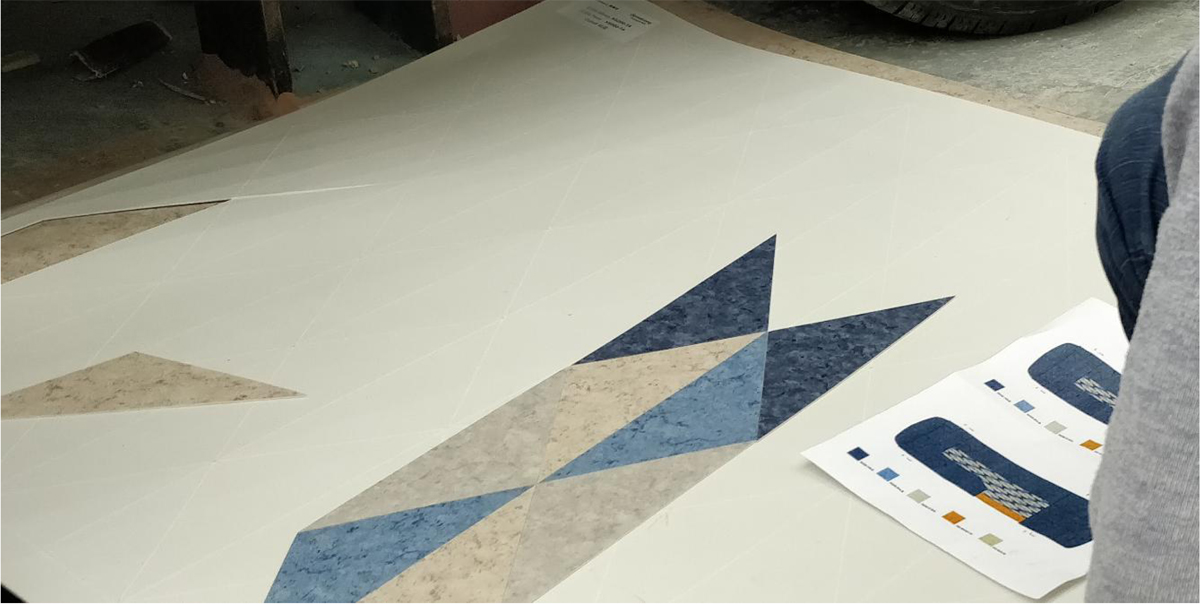
(2) Use tools such as ink lines and a 2M steel ruler to confirm the mosaic area.
Use a mixer to mix the adhesive. UZIN KR430 adhesive needs to be used with a curing agent. Evenly brush it with a scraper in the mosaic area, ensuring sufficient adhesives at every corner;
The adhesive requires a certain temperature and air drying environment to achieve optimal results. If the operating environment temperature is too low, use baking machine to increase the temperature;
Due to the manual mixing of the adhesive, the proportion and the available time cannot be accurate,the operators must not leave and should keep an eye on the adhesive, wait to lay the flooring.
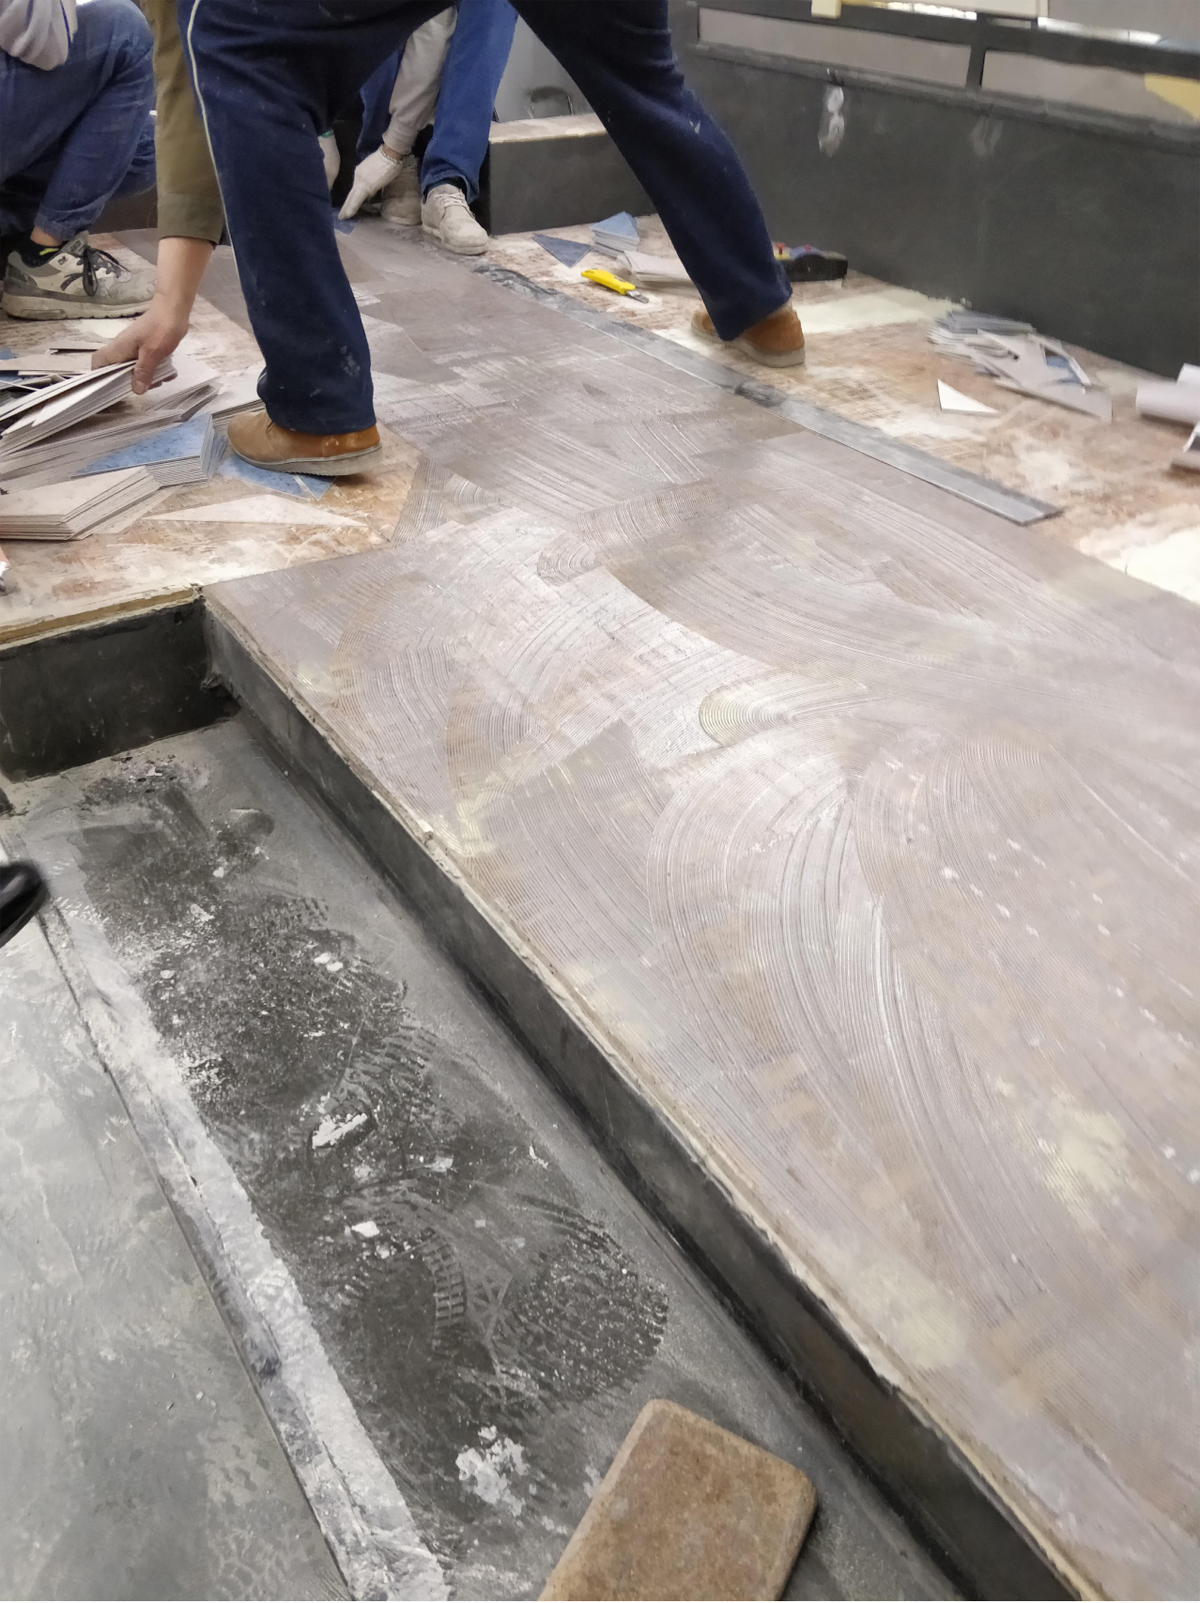
(3)When starting to install, use a 2M steel ruler to fix one side of the boundary, slowly stick from the boundary, align with each edge, and wipe the adhesive squeezed out of the gap in time with a cleaning box to prevent it from drying out and affecting the appearance of the floor surface.
(4) After installing 1/4 of the mosaic areas, the flooring panels gradually become larger. In order to prevent it from moving, it is necessary to use the masking tape to fix it vertically.
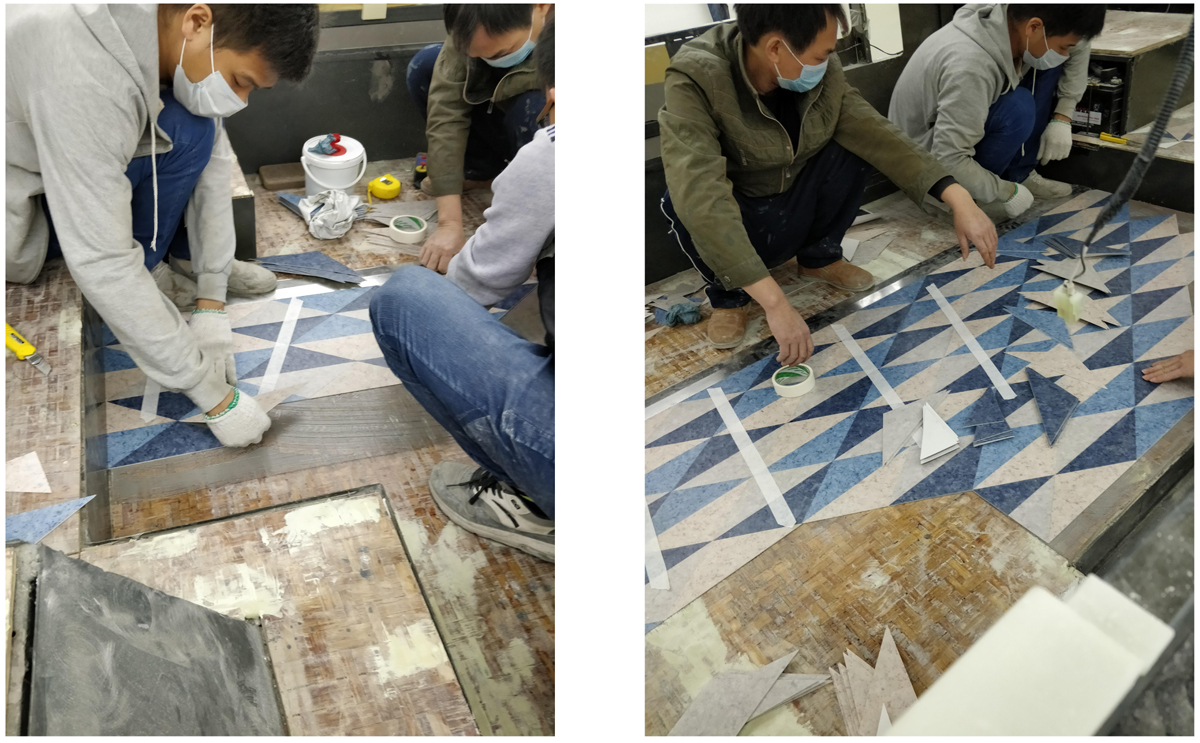
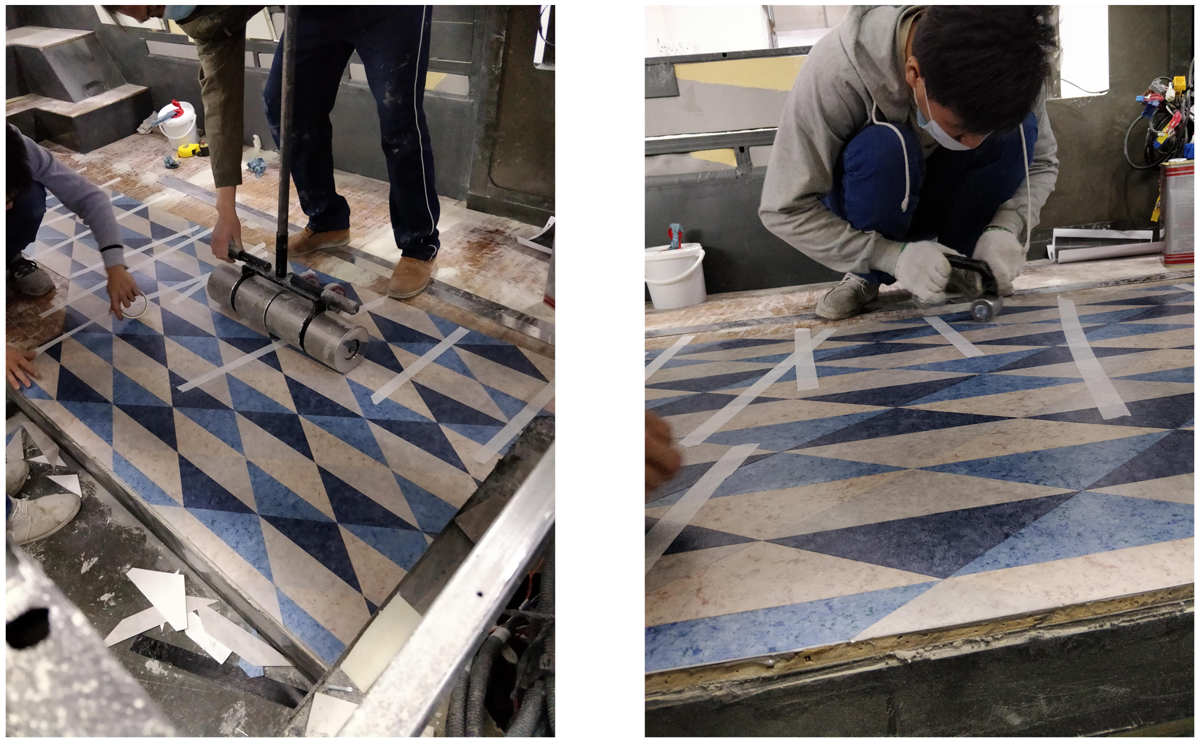
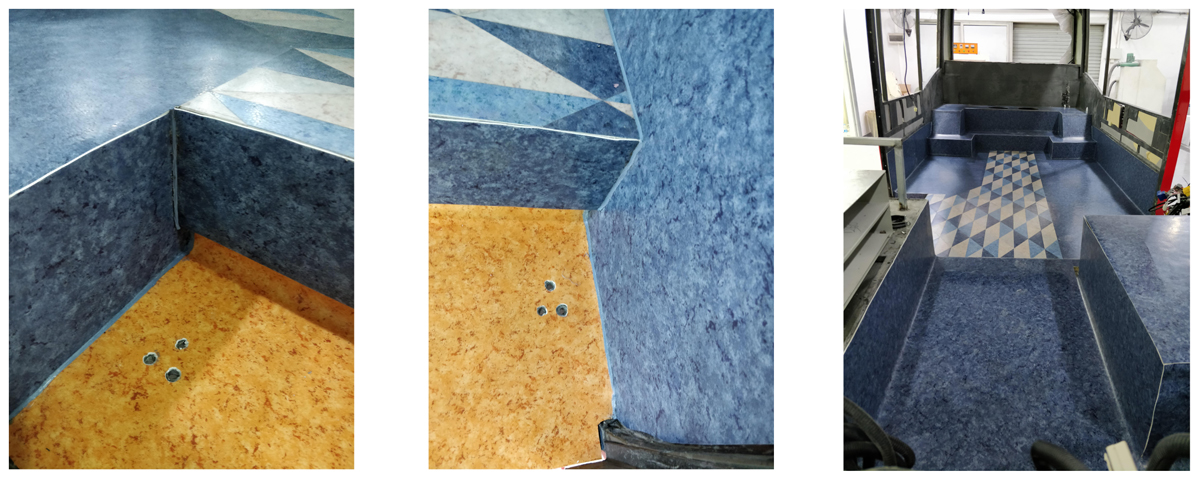
(5) After the mosaic part is completed, use a 50KG large pressure roller to press the surface of the mosaic firmly. The joint details of the mosaic panel should be carefully pressed with double headed pressure rollers. If there is adhesive leakage, clean it promptly with a cleaning box.
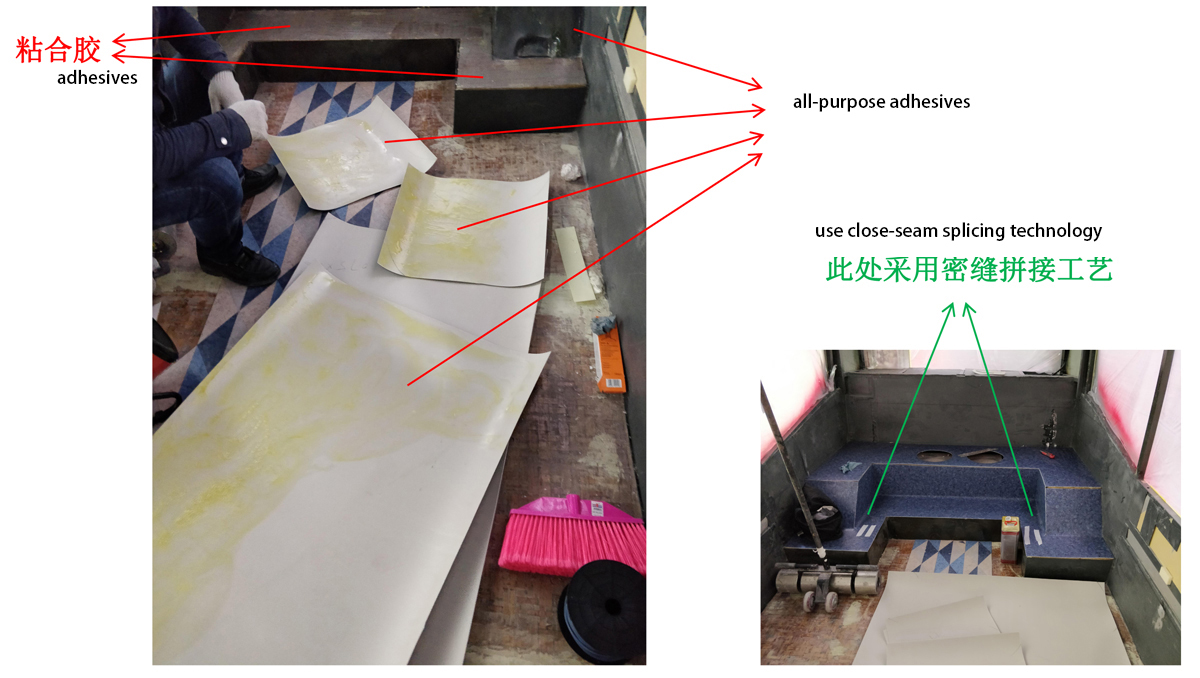
(6)When install the floor in rear area, brush glues on the horizontal surface, use Yinguan brand ABC all-purpose adhesive on the vertical sides (note:when pasting the vertical surface, apply evenly all-purpose adhesive to both the vertical surface and the vinyl floor bonding surface).
(7) Install the flooring on the middle door step surface.
(8) After completing the interior flooring and mosaic installation,use hot welding technology with welding rods to fuse the edge of the parts without battens. After the welding rods are fused, special tools should be used to trim and decorate the edges to achieve the best effect. Wait for the adhesive to dry,then complete all steps of the installation.
5、 Construction Notes
1. Carefully check color ;
2. For areas such as mosaic,close seam splicing, and large-area splicing, try to use the masking tapes as much as possible for fixation;

3. The edge of the mosaic is not within the range of machine cutting and can only be cut by the existing mosaic panels. In this case, a dolphin knife and a flying edge knife are used in combination to trim and smooth the edges;

4. After the installation of the mosaic, it is not allowed to step on it within 2 hours to prevent the mosaic from moving due to the adhesive not drying up. When the ambient temperature is below 12 ℃, a baking machine can be used to assist in drying and accelerating the bonding process;